Thursday, March 24, 2011

How to :Test IIS Media service Smooth streaming tutorial

Http for streaming, for IIS, there is the media service, let’s download and install it using the platform installer

 http://www.iis.net/media

using the web platform installer 3.0 (like the Yum for Centos), pick up the media service package and click to install.
image

image

also install the smooth string client,

image

when done, you will noticed that in install several HttpHandlers to IIS,

image

and check the handler mapping features,

Path Handler
*.ism Smoothhandler
*.isml LiveStreamingHandler
*.isx PlayListHandler

image

Also you will see several media tools,

image

Now we have the infurscture and components to Host and support the smooth streaming, we need import those assets to the virtual Directory just like other aspx files.

encoder  , there is a encoder to encode one raw video file to tens of other formats with different qualities. (used for smooth streaming, when the network bandwidth is great enough, throw the 1080P one to the client. )
Download encoder full version (Expression Studio 4 Premium (x86) - DVD (English))from your MSDN subscription. note, the free downloadable encoder 3 doesn’t support the smooth streaming encoding. No free lunch,

>>so download Expresion 4, and install the Microsoft Expression Encoder 4 with Service Pack 1 (SP1)

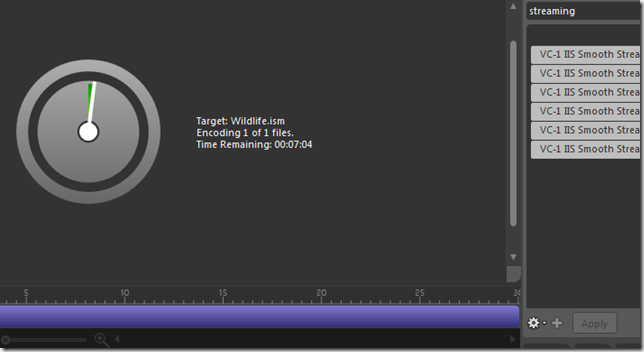
Create a new project, import the raw video. search and select all streaming presets and click apply. then click encode to go,
image

this process is a CPU intensive work, try to run on more powerful server with lots cpu cores.
the output folder looks like this, one ism file and several ismv files based on your presets selectons
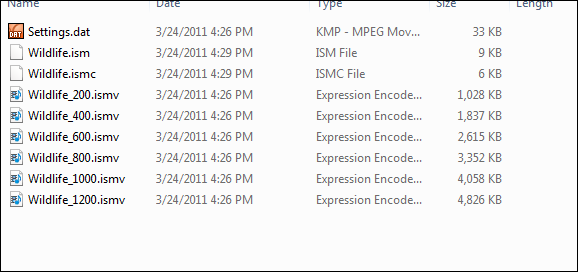
image

Now copy this folder to the iis virtual folder you created,
then you can see the file listed in the iis add-on , smooth streaming,
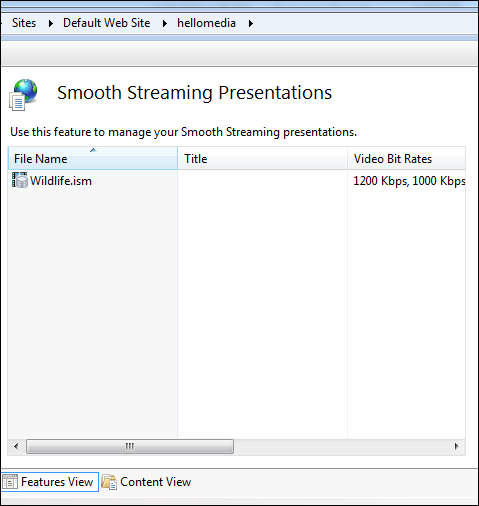
image

host/runtime is ready, content is there, now need to write a Silverlight client to view the content,

let’s build using  the Microsoft Silverlight Media Framework 2.4, which comes with the built-in streaming player.

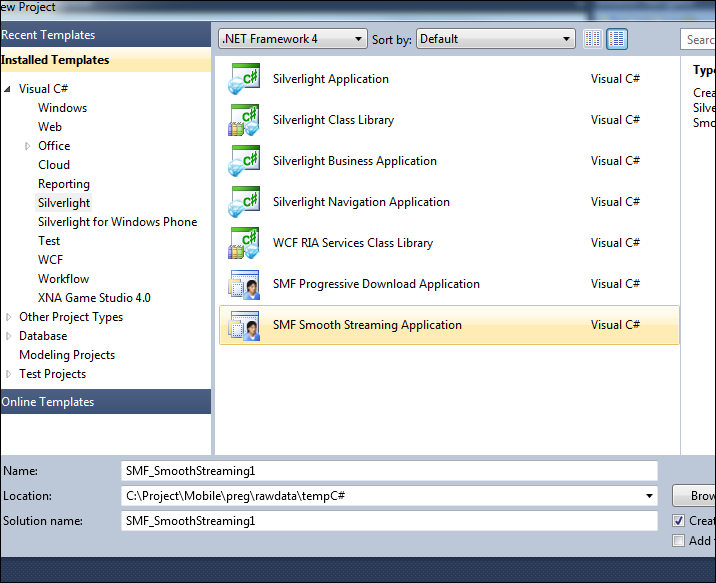
create one smooth streaming application( a Silverlight project which has been customized to reference the extensions dll.)

image

replace the ism file with ours,


 <Grid x:Name="LayoutRoot"  Loaded="LayoutRoot_Loaded" Background="White">
        <smf:SMFPlayer x:Name="s" AutoPlay="True">
            <smf:SMFPlayer.Playlist>
                <media:PlaylistItem DeliveryMethod="AdaptiveStreaming"  MediaSource="http://localhost/hellomedia/Wildlife.ism/Manifest"/>
            </smf:SMFPlayer.Playlist>
        </smf:SMFPlayer>
    </Grid>


put a clientaccesspolicy.xml to the iis root folder,


<?xml version="1.0" encoding="utf-8"?>

<access-policy>


  <cross-domain-access>


    <policy>


      <allow-from http-request-headers="*">


        <domain uri="*"/>


        </allow-from>


      <grant-to>


        <resource path="/" include-subpaths="true"/>


      </grant-to>


    </policy>


  </cross-domain-access>


</access-policy>


then click F5 to run, that’s it.


image


in case you can’t see the video, check this out ,why? Silverlight smf player never play.

why? Silverlight smf player never play.

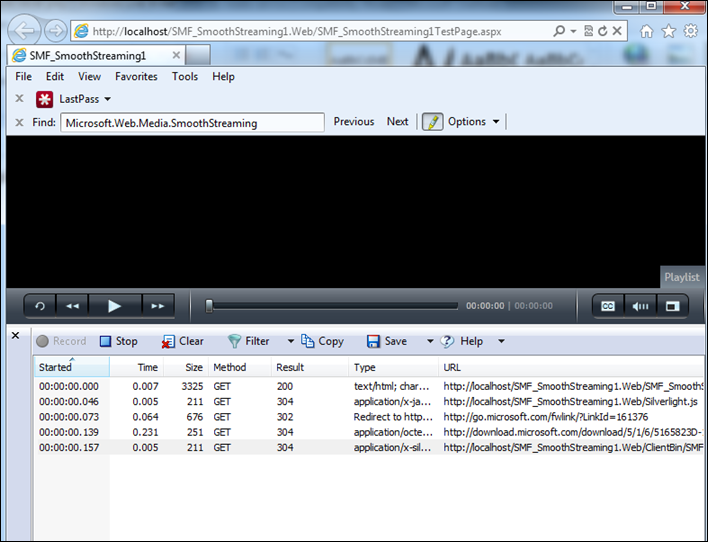
Just installed the SMF sdk and point the ism to my IIS steaming server, click f5 to run the app, it’s a black screen. it never check crossdomain.xml, it never sends out the request

image

Click the play, nothing happened, then I run the debug and turn on all exceptions,
image

run again, aha, one dll is missing,

image

So you need to install streaming client 1.5, http://www.iis.net/download/SmoothClient
just serach streaming in the web platform installer ,click and install

image

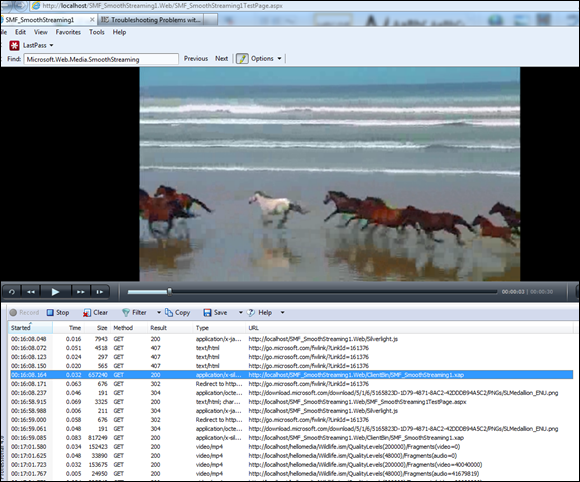
after that, reference the dll located in [C:\Program Files (x86)\Microsoft SDKs\IIS Smooth Streaming Client\v1.5\Silverlight] to your project, then rebuild, all set, now the horses can run now, lol

image

Also, make sure crossdomain.xml is there.

in case you can’t see the video, check this out ,why? Silverlight smf player never play.

Monday, March 21, 2011

How to: install and test Hive on hadoop cluster

After we install and config hadoop to run in fully distributed Mode, Centos, then we will move forward and test Hive.

Download one stable release from apache site, and decompress it.

wget http://mirror.metrocast.net/apache//hive/stable/hive-0.6.0.tar.gz
tar -xvf hive-0.6.0.tar.gz
cp –rf hive-0.6.0 /usr/lib/hive
export PATH=$PATH:/usr/lib/hive/bin
#need to setup the hadoop home variable
export HADOOP_HOME=/usr/lib/hadoop

then you can run hive command shell,
image

the hive here is just a standard java application, here is all the arguments to start hive shell,
/usr/lib/jvm/java/bin/java -Xmx4096m -Dhadoop.log.dir=/usr/lib/hadoop/logs -Dhadoop.log.file=hadoop.log -Dhadoop.home.dir=/usr/lib/hadoop -Dhadoop.id.str= -Dhadoop.root.logger=INFO,console -Djava.library.path=/usr/lib/hadoop/lib/native/Linux-amd64-64 -Dhadoop.policy.file=hadoop-policy.xml -classpath "all the jars" org.apache.hadoop.util.RunJar /usr/lib/hive/lib/hive-cli-0.6.0.jar org.apache.hadoop.hive.cli.CliDriver
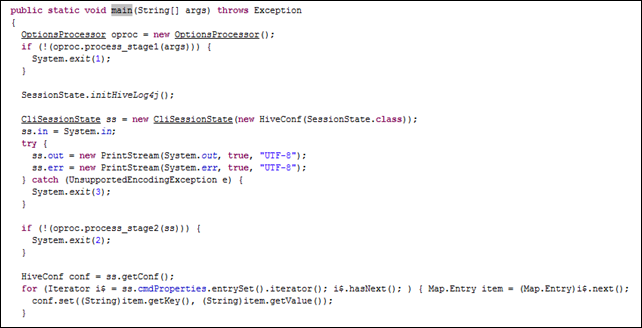
the clidriver is a standard java application to process users commands
image

By default , hive use the java  derby as the store to keep meta data.
image

given the raw input like this

"01","35004","AL","ACMAR",86.51557,33.584132,6055,0.001499
we will create a table called rawtable first just with one column to hold all the data, using the syntax of creating table http://wiki.apache.org/hadoop/Hive/HiveQL

Create table rawtable(raw string);
load data inpath ‘/user/hadpoop/input’ into table rawtable;
image

when you run a simple query, (select count  ( *) from rawtable, you can tell the mr job is invoked to get the results.
image

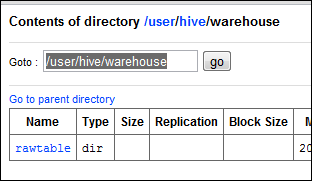
if you check the hdfs file systems, every table you just created will be stored under /user/hive/warehouse/[tablename]
image

After that, we can write quite complex query like join, subquery, check it out here, http://wiki.apache.org/hadoop/Hive/HiveQL

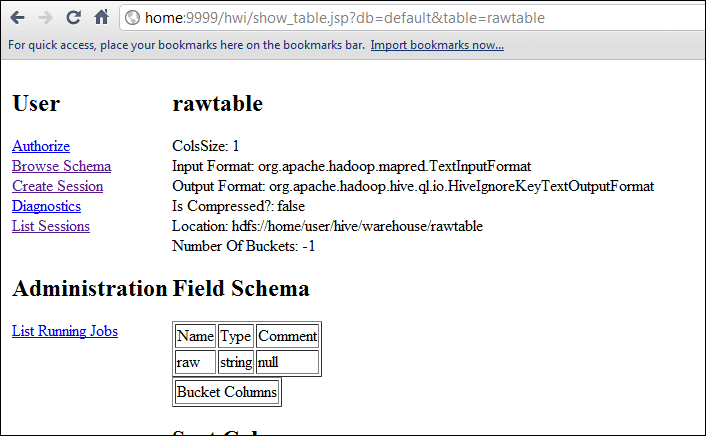
Besides, CLI , you can run ‘hive –service hwi’ to expose a simple web interface for data accessing, http://home:9999/hwi

image

Also, we can start a hive server image

remote user can use the thrift api or JDBC to connect this DB powered by Hive.

Thursday, March 17, 2011

ADB Driver for HTC wildfire and T-Mobile G2

when you see the blog, you may have the problem to install driver for those two Phones, why?

the download driver might be old and doesn’t contain the information about new released Phones.

you can open the USB driver folder, there is one file [android_winusb.inf], here is mine by default. two sections are highlighted


[Google.NTx86]

; HTC Dream
%SingleAdbInterface%        = USB_Install, USB\VID_0BB4&PID_0C01
%CompositeAdbInterface%     = USB_Install, USB\VID_0BB4&PID_0C02&MI_01
%SingleBootLoaderInterface% = USB_Install, USB\VID_0BB4&PID_0FFF
; HTC Magic
%CompositeAdbInterface%     = USB_Install, USB\VID_0BB4&PID_0C03&MI_01
;
;Moto Sholes
%SingleAdbInterface%        = USB_Install, USB\VID_22B8&PID_41DB
%CompositeAdbInterface%     = USB_Install, USB\VID_22B8&PID_41DB&MI_01
;
;Google NexusOne
%SingleAdbInterface%        = USB_Install, USB\VID_18D1&PID_0D02
%CompositeAdbInterface%     = USB_Install, USB\VID_18D1&PID_0D02&MI_01
%SingleAdbInterface%        = USB_Install, USB\VID_18D1&PID_4E11
%CompositeAdbInterface%     = USB_Install, USB\VID_18D1&PID_4E12&MI_01

[Google.NTamd64]
; HTC Dream
%SingleAdbInterface%        = USB_Install, USB\VID_0BB4&PID_0C01
%CompositeAdbInterface%     = USB_Install, USB\VID_0BB4&PID_0C02&MI_01
%SingleBootLoaderInterface% = USB_Install, USB\VID_0BB4&PID_0FFF
; HTC Magic
%CompositeAdbInterface%     = USB_Install, USB\VID_0BB4&PID_0C03&MI_01
;
;Moto Sholes
%SingleAdbInterface%        = USB_Install, USB\VID_22B8&PID_41DB
%CompositeAdbInterface%     = USB_Install, USB\VID_22B8&PID_41DB&MI_01
;
;Google NexusOne
%SingleAdbInterface%        = USB_Install, USB\VID_18D1&PID_0D02
%CompositeAdbInterface%     = USB_Install, USB\VID_18D1&PID_0D02&MI_01
%SingleAdbInterface%        = USB_Install, USB\VID_18D1&PID_4E11
%CompositeAdbInterface%     = USB_Install, USB\VID_18D1&PID_4E12&MI_01

All you need to do is manually add the Adbinterface information to both seconds, then install the driver again.

; HTC Wildfire
%SingleAdbInterface%        = USB_Install, USB\VID_0BB4&PID_0C8B
%CompositeAdbInterface%     = USB_Install, USB\VID_0BB4&PID_0C8B&MI_01

;T-Mobile G2
%SingleAdbInterface%        = USB_Install, USB\VID_0BB4&PID_0C91
%CompositeAdbInterface%     = USB_Install, USB\VID_0BB4&PID_0C91&MI_01

Tuesday, March 15, 2011

Android Debugging, Start the Gallery App programmatically, decode/decompress AndroidManifest.xml

I just create one code snippet to save one Image from internet to SD card using the follow code, after that, I want to open the gallery app to view this Image.

URL url = new URL(address);
Object content = url.getContent();
InputStream is = (InputStream)content;

BufferedInputStream bis = new BufferedInputStream(is);
Bitmap bm = BitmapFactory.decodeStream(bis);
bis.close();
is.close();
iv.setImageBitmap(bm); //bind to UI

String sdurl = Media.insertImage(getContentResolver(), bm, "pic1", null);
//url will be, content://media/external/images/media/29


How to Start the Gallery app and show this Image?

Intent intent = new Intent(Intent.ACTION_VIEW);
intent.setData( Uri.parse(temp));
             
this.startActivity(intent);


image

If you don’t know how to start a system activity, here is the trick, using the aapktool
basically, pull the apk from the Phone using the DDMS file browser plug-in, here I am pulling out the gallery apk located in /syste/app/*.apk
image

Download the extract the appktool. then run aapt.
here is the trick, all activity has the AndroidManifest.xml, in that xml, you can find all the declared intent filters to start this activity. By default , this file is compressed. so you need the appt tool to decompress it. here is how.
aapt dump xmltree Gallery3DGoogle.apk  AndroidManifest.xml >a.txt

then in the a.txt, you can see all the declared intent. I just pickup the view one.

image

Tuesday, March 8, 2011

How to : install and configure DRBD on two Centos Vms tutorial

DRBD is a Linux Kernel module that constitutes a distributed storage system. You can
use DRBD to share block devices between Linux servers and, in turn, share file systems and data.
   in a nutshell, Data change on Master Node will be synced to Slave node in the real time mostly. changes on master will be captured on the kernel level, then push the change to slave node and get network ack when nodes are connected. If network is broken, the data change will be queued locally and flush to remote node when it get online.

 image

Here , I will install and configure a two nodes cluster using two centos vm.  we need make sure both VM are network-reachable. then just install, make and config steps.

Let’s say I have two Nodes, they are Home and LA. I will start the setup from Home

On Both Nodes, expand the Disk to add more space and create a new partition hda4 with the same size (not required.)

image

expand the disk space , here i  will expend 1G more space.

image

then create the partition hda4
image

Also make sure each node has two NIC card for failover.

Now, we will use a GUI tool to install and config the drbd cluster, it’s called DRBD-MC which is a standard java application. It will call yum to install the drbd and push the change the those conf files when user click the gui.

Download the jar file from http://oss.linbit.com/drbd-mc/, drbc-mc.jar and run the jar file on master node.

java –jar ~/Desktop/drmc-*.jar
image

the main screen ,

image

Click the Host wizard and add one master node called Home and enter the root password.
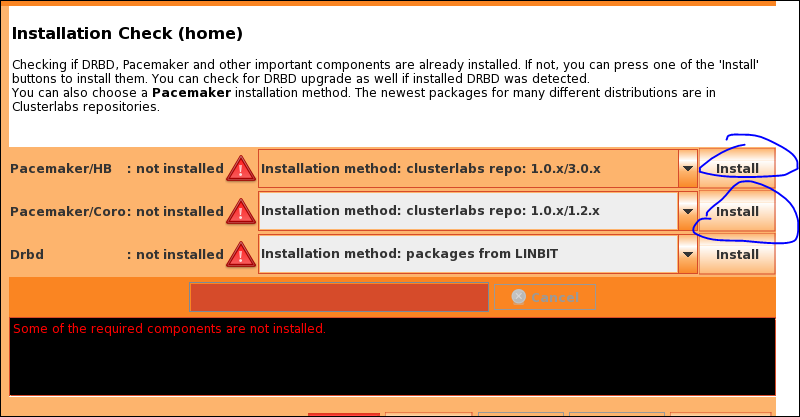
here is the sweet set of the tool, it prerequisites component is missing, just click install to bring it in.

image
here is the generated script to install pacemaker

wget -N -nd -P /etc/yum.repos.d/ http://www.clusterlabs.org/rpm/epel-5/clusterlabs.repo && rpm -Uvh http://download.fedora.redhat.com/pub/epel/5/i386/epel-release-5-4.noarch.rpm ; yum -y -x resource-agents-3.* -x openais-1.* -x openais-O.9* -x heartbeat-2.1.* install pacemaker.x86_64 heartbeat.x86_64 && /sbin/chkconfig --add heartbeat

after install drbd and necessary dependency component like pacemaker, click Cluster wizard to create a cluster. I will name it helloworld

image

And select two available hosts

image

chose the default communication protocol.

image

Click to add two interfaces
image

Create the create config button to generate the conf file

image

after done, click the storge manu, chose the hda4 partition, click the action manu to select the LA mirror device

image

give it a resource name hda4

image

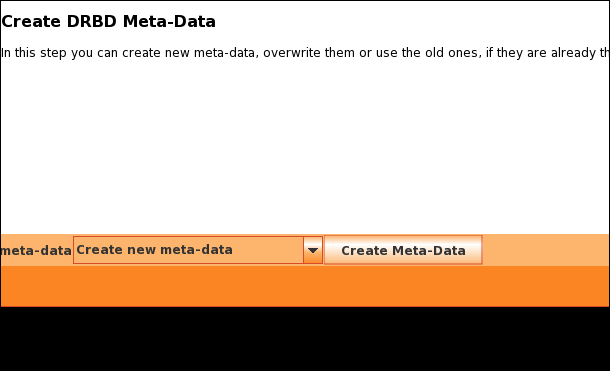
click next then you need to create a metadata, here we will keep the meta data into the device itself

image

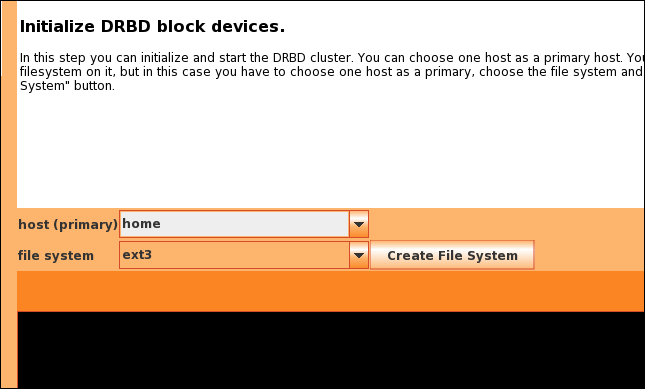
then chose Home as the primary node, and create a ext3 filesystem

image

Now the device will be synced from home node to la node.

image

you can also run service drbd status. or just cat /porc/drbd
image

from the secondary node, you can tell its role is secondary.
image 
then wait for the sync to be done.

Now, we can mount the /dev/drbd0 device to a file system.
mkdir /mnt/drbd/hda4
mount /dev/drbd0 /mnt/drbd/hda4

then every change to /mnt/drbd/hda4 folder will be synced to secondary node.
Please note here the secondary is read-only mode, you can’t mount the system unless you switch the role to primary node.
image


let’s create some file on master first.
touch helloworld.master

then on the primary node, bring down it’s interface to simulate a network error.
ifdown eth0
ifdown eth1
and on the slave node, change its role to primary.

image

the cluster is in disconnected state, let’s switch secondary node to take over the primary role


drbdadm primary hda4, now secondary has the  primary role.
image
mount /dev/drbd0 /mnt/drbd/hda4
then we can mount the device and see the helloworld.master is there.
image

As I say, drbd is one low level service to enable block level replication. we can use this mechanism to replicate the DB binary log of mysql or wal log of postgres , then we can get some level of High availability.

If we want to switch back the role ( now LA is the primary node, Home is unknow. )

one LA Node. (invalidate the primary role.)
image

On Home Node , just turn on the network service, ifup eth0, ifup eth1. and run “drbdadm connect hda4”
all set, role switched back to initial setting. Home is Primary, La is secondary.
image

Hope it helps.

 
Locations of visitors to this page