Sunday, April 17, 2011

Android IntentService, how to write a background service keep polling data and notify Activity for Change.

Let me put a simple test application, One activity and One Service. for the service, it will do the background job like networking, computation. and notify the Acidity to do some UI side rendering or notification to User.

first , Create one Simple Android application with just one Activity,

public class UIActivity extends Activity {
    /** Called when the activity is first created. */
   
    TextView tv;
    @Override
    public void onCreate(Bundle savedInstanceState) {
        super.onCreate(savedInstanceState);
        tv=new TextView(this);
        tv.setText("hello,World");
        setContentView(tv);
    }
   
   
}


then Add one Handler in the activity which will be called by the bakcground service when there are any change get triggered,

Handler handler=new Handler()
    {
        @Override
        public void handleMessage(Message msg) {
            //get data from msg
           
            String result=msg.getData().getString("result");
            tv.setText(result);
            Log.d("xxxxx", "get data" + result);
            super.handleMessage(msg);
        }
    };


then Create one Service inherited from IntentService, here we defined a timer which will do the periodic checking and send back data change to activity,

public class BackService extends IntentService {

    public BackService()
    {
        super("myintentservice");
    }
   
   
    Messenger messenger;
    Timer t=new Timer();
   
   
    @Override
    protected void onHandleIntent(Intent intent) {
        messenger=(Messenger) intent.getExtras().get("handler");
       
        t.schedule(new TimerTask() {
           
            @Override
            public void run() {
                // just call the handler every 3 Seconds
               
                Message msg=Message.obtain();
                Bundle data=new Bundle();
                data.putString("k", "value" + System.currentTimeMillis() );
                msg.setData(data);
               
                try {
                    messenger.send(msg);
                } catch (RemoteException e) {
                    // TODO Auto-generated catch block
                    e.printStackTrace();
                }
            }
        }, 100,3000);
       
    }

}


for Activity, need to specify the handler through putextra and start the service,

public void onCreate(Bundle savedInstanceState) {
     super.onCreate(savedInstanceState);
     tv=new TextView(this);
     tv.setText("hello,World");
     setContentView(tv);
    
     Intent i=new Intent(this, BackService.class);
     i.putExtra("handler", new Messenger(this.handler));
     this.startService(i);
    
}


remember to register the backservice into the manifest.xml,
when you run the app, you will see the textview will change every 3 seconds,
image
run adb logcat XXXXX:D *:S, even the activity is brought to background , the Activity still get the change from service,
image

Tuesday, April 12, 2011

How to : QT Hello world localization and I18N

When you installed QT SDK, it came with several useful tools to do the I18N and localization, I’ll put a very basic QT program and show the basic steps to localize the app to support different local /languages.

Create a Basic QT hello world application, make sure all user-visible strings are used as translatable strings (using tr function)
Create a empty QT Project using QT creator,
image
then add a new source file,

image

#include <QtGui>

int main(int argc, char * argv[])
{
    QApplication app(argc,argv);
    QPushButton * button=new QPushButton(QObject::tr("Hello,World!"));
    button->show();
    app.exec();
}

then run the app by pressing F5, you will see the hello world button,
 image

Now we are going to add the Chinese and Japanese Support to the app.

>>> go the the project folder, Run a command called Lupdate(include in the sdk ), to extract all translatable strings to a file,
image

here default.ts is just a xml file as the content bellows,
image

>>>now use the linguist tool to translate it into Japanese, run “linguist” In the qt shell or click the tool from start-menu
open the default.ts, and chose Japanese as the target language,
image

put the translation for hello world in Japanese, and click to mark done, then Save it as  as jp.ts
image

Now quite the translation tool and start over again to translate it to Chinese, and export to cn.ts
>>>compile the cn.ts and jp.ts to binary format using lrelease
image

>>> now in the app, load those two qm files,

QApplication app(argc,argv);

QTranslator translator ;

QLocale curent;
if(curent==QLocale::Chinese)
{
translator.load("F:\\helloworld\\cn.qm");
app.installTranslator(&translator);
}
if(curent==QLocale::Japanese)
{
translator.load("F:\\helloworld\\jp.qm");
app.installTranslator(&translator);
}

QPushButton * button=new QPushButton(QObject::tr("Hello,World"));
button->show();
app.exec();


Now, if you setup your current locale to Japanese, you will see the JP version of helloword

or you can change the default local in code,

QLocale::setDefault(QLocale::Japanese);


image image

Friday, April 8, 2011

How to: install ADB driver for Motorola Xoom

Download and install the Driver from Motorola,
 http://developer.motorola.com/docstools/USB_Drivers/
image

in your xoom device, enable the USB debugging under application section settings,
image

then in windows, it will find new device and apply the ADB driver.
image

Now you can run adb devices, to see the device is there

for all other non-google device, here is the list of their drivers,
http://developer.android.com/sdk/oem-usb.html

Wednesday, April 6, 2011

Hadoop: How to install and test PIG

like install and test Hive on hadoop cluster, Pig is another end-user facing analytical tools for Hadoop. unlike SQL style query for Hive, Pig use the scripting language which will be more familiar to Sys admins.

Download Pig From Yahoo, http://www.apache.org/dyn/closer.cgi/pig

Unzip the files and go the bin folder, only change is we need to add the hadoop conf folder to the class path. then pig knows how to deal with hadoop cluster,

# cygwin path translation
if $cygwin; then
    CLASSPATH=`cygpath -p -w "$CLASSPATH"`
    PIG_HOME=`cygpath -d "$PIG_HOME"`
    PIG_LOG_DIR=`cygpath -d "$PIG_LOG_DIR"`
fi

#add hadoop conf folder to the classpath

export CLASSPATH=$CLASSPATH:/usr/lib/hadoop/conf

After that, you can run the ./bin/pig to start the shell of Pig,

image

Here are the Pig syntax.
http://pig.apache.org/docs/r0.8.0/cookbook.html

Hadoop, java.lang.ClassCastException: org.apache.hadoop.io.LongWritable cannot be cast to org.apache.hadoop.io.Text

If you work on a Mapper which expects the file format of keyvalue, and forget to specify the inputformat to jobconf, you will get the following errors.

java.lang.ClassCastException: org.apache.hadoop.io.LongWritable cannot be cast to org.apache.hadoop.io.Text
at MR.map(MR.java:1)
at org.apache.hadoop.mapred.MapRunner.run(MapRunner.java:50)
at org.apache.hadoop.mapred.MapTask.runOldMapper(MapTask.java:358)
at org.apache.hadoop.mapred.MapTask.run(MapTask.java:307)
at org.apache.hadoop.mapred.Child.main(Child.java:170)


here is why,

for the jobconf, the default inputformat is TextInputFormat,
image

you will get Key/value type of longwritable/text in your Map function.
if you put something like Text as the key, you will get the classcast exception

public void map(Text key, Text value,
OutputCollector<Text, Text> collector,
Reporter paramReporter) throws IOException {

So always remember to specify the InputFormat.
image

Thursday, March 24, 2011

How to :Test IIS Media service Smooth streaming tutorial

Http for streaming, for IIS, there is the media service, let’s download and install it using the platform installer

 http://www.iis.net/media

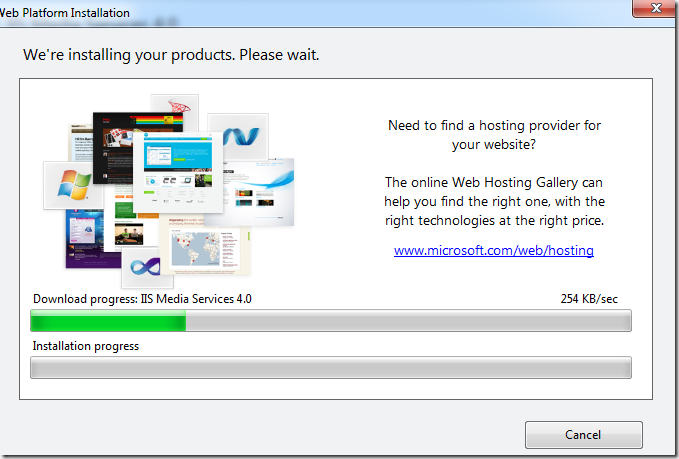
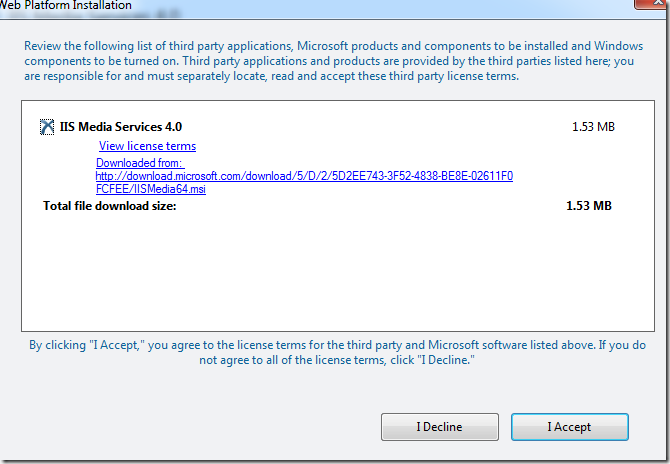
using the web platform installer 3.0 (like the Yum for Centos), pick up the media service package and click to install.
image

image

also install the smooth string client,

image

when done, you will noticed that in install several HttpHandlers to IIS,

image

and check the handler mapping features,

Path Handler
*.ism Smoothhandler
*.isml LiveStreamingHandler
*.isx PlayListHandler

image

Also you will see several media tools,

image

Now we have the infurscture and components to Host and support the smooth streaming, we need import those assets to the virtual Directory just like other aspx files.

encoder  , there is a encoder to encode one raw video file to tens of other formats with different qualities. (used for smooth streaming, when the network bandwidth is great enough, throw the 1080P one to the client. )
Download encoder full version (Expression Studio 4 Premium (x86) - DVD (English))from your MSDN subscription. note, the free downloadable encoder 3 doesn’t support the smooth streaming encoding. No free lunch,

>>so download Expresion 4, and install the Microsoft Expression Encoder 4 with Service Pack 1 (SP1)

Create a new project, import the raw video. search and select all streaming presets and click apply. then click encode to go,
image

this process is a CPU intensive work, try to run on more powerful server with lots cpu cores.
the output folder looks like this, one ism file and several ismv files based on your presets selectons
image

Now copy this folder to the iis virtual folder you created,
then you can see the file listed in the iis add-on , smooth streaming,
image

host/runtime is ready, content is there, now need to write a Silverlight client to view the content,

let’s build using  the Microsoft Silverlight Media Framework 2.4, which comes with the built-in streaming player.

create one smooth streaming application( a Silverlight project which has been customized to reference the extensions dll.)

image

replace the ism file with ours,


 <Grid x:Name="LayoutRoot"  Loaded="LayoutRoot_Loaded" Background="White">
        <smf:SMFPlayer x:Name="s" AutoPlay="True">
            <smf:SMFPlayer.Playlist>
                <media:PlaylistItem DeliveryMethod="AdaptiveStreaming"  MediaSource="http://localhost/hellomedia/Wildlife.ism/Manifest"/>
            </smf:SMFPlayer.Playlist>
        </smf:SMFPlayer>
    </Grid>


put a clientaccesspolicy.xml to the iis root folder,


<?xml version="1.0" encoding="utf-8"?>

<access-policy>


  <cross-domain-access>


    <policy>


      <allow-from http-request-headers="*">


        <domain uri="*"/>


        </allow-from>


      <grant-to>


        <resource path="/" include-subpaths="true"/>


      </grant-to>


    </policy>


  </cross-domain-access>


</access-policy>


then click F5 to run, that’s it.


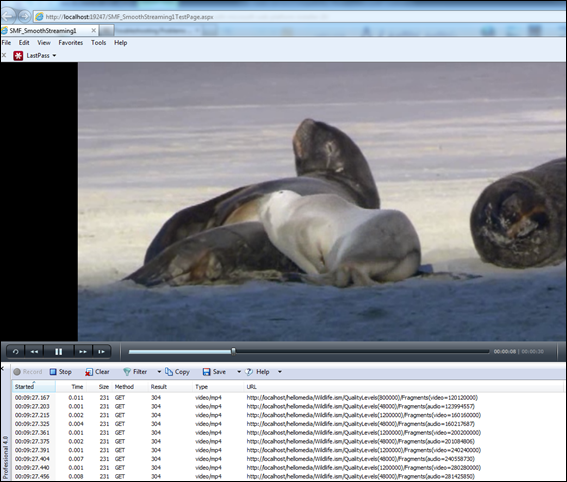
image


in case you can’t see the video, check this out ,why? Silverlight smf player never play.

why? Silverlight smf player never play.

Just installed the SMF sdk and point the ism to my IIS steaming server, click f5 to run the app, it’s a black screen. it never check crossdomain.xml, it never sends out the request

image

Click the play, nothing happened, then I run the debug and turn on all exceptions,
image

run again, aha, one dll is missing,

image

So you need to install streaming client 1.5, http://www.iis.net/download/SmoothClient
just serach streaming in the web platform installer ,click and install

image

after that, reference the dll located in [C:\Program Files (x86)\Microsoft SDKs\IIS Smooth Streaming Client\v1.5\Silverlight] to your project, then rebuild, all set, now the horses can run now, lol

image

Also, make sure crossdomain.xml is there.

in case you can’t see the video, check this out ,why? Silverlight smf player never play.

 
Locations of visitors to this page